As some readers may know, I actually maintain two blogs: RoadToMR focuses on Mixed Reality and jared.bienz.com focuses on non-MR projects (like doing cool things with my Tesla). It’s rare that a project is worthy of cross-posting, but this one is special.
In 2018 I wrote an article about Learning Microsoft Layout. In 2019 I wrote several articles about the massive Model 3 Sound Project. Today I connect the Tesla Car Stereo project with my passion for Mixed Reality, and learn about Microsoft Guides in the process!
I won’t go deep into why Guides exists, but in a nutshell it helps experts share knowledge and experience with beginners. If you’ve never seen Guides in action, I highly recommend pausing to watch this two minute intro video. It’ll give you a feel for the process.
In this article I’ll share experience gained while creating my first guide. For those who simply want to see the final guide in action, wait no more: 😊
Table of Contents
Getting started
Because Guides is built on top of Dynamics, the setup process is a bit … involved. The downside is a more complex setup than simply installing an app. The upside is a much more robust security and content management model than you’ve probably ever seen on a HoloLens app. I won’t cover installation in this article, but if you want to start a trial or regular account go to Overview of setting up Dynamics 365 Guides.
Learning the tool
Once Guides is installed, the first thing you’ll want to do is get familiar with the tool. So far the two best resources I’ve found are:
- Quick Start Videos – An official YouTube playlist of 14 short videos. Each teaches a core concept you’ll need to know to create a successful guide.
- How to make a great guide – An excellent article on how to plan and put together your guide.
docs.Microsoft.com has other helpful articles for both authors and operators. Like how to limit access to specific guides and how to import custom models.
Planning
The best resource I can share for this step is the How to make a great guide article mentioned above. But there is one tip I want to share that’s not called out in that article: If you’re trying to create a guide by watching an expert, the best thing you can do is ask them to teach someone new and observe those interactions instead. You’ll gain far more insight by watching someone teach than you will by watching them work. (Credit to Ethan Arnowitz for this tip.)
I knew from the beginning that my guide would never “go into production”. Instead, my goal was to learn as much as possible about Guides in a single guide. Specifically, I wanted to learn:
- Using custom images
- Using custom videos
- Using custom 3D models
- Using custom animations
- Applying model styles
- Anchors and persistence of anchors across runs
- How large (physically) a guide I could create with a single anchor
- Leveraging tethers to help the user move to new focus areas
- Whether I could transition into and out of a vehicle in a single guide
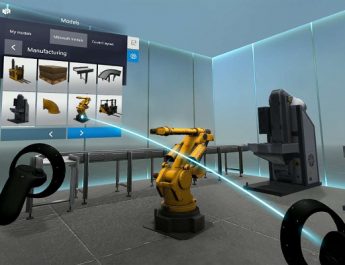
With the goals defined, I decided to create a fictitious guide that would walk users through testing for thermal issues like the ones documented in my M3S: Power article.
Building
The first thing we’re asked when creating a new guide is how we want to anchor it to the world.
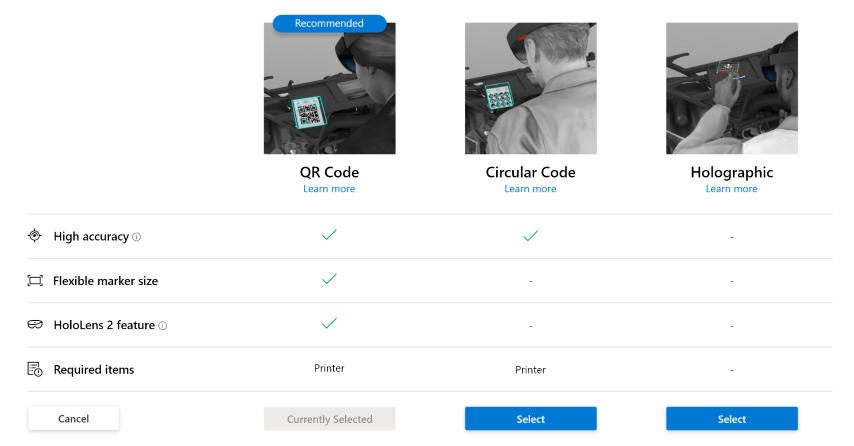
QR Codes are the most accurate and easiest to use for HoloLens 2 (but aren’t available for HoloLens 1). Circular Codes work on HoloLens 1 but aren’t as accurate as QR Codes. “Holographic” is simpler than it sounds. Basically, you’ll have a 3D part part in the guide that the user can match up with the same part in the real world. It works, but it’s the least accurate option since it’s really a manual process. I’m using HoloLens 2, so I chose QR code.
Next you’ll see the Outline view:
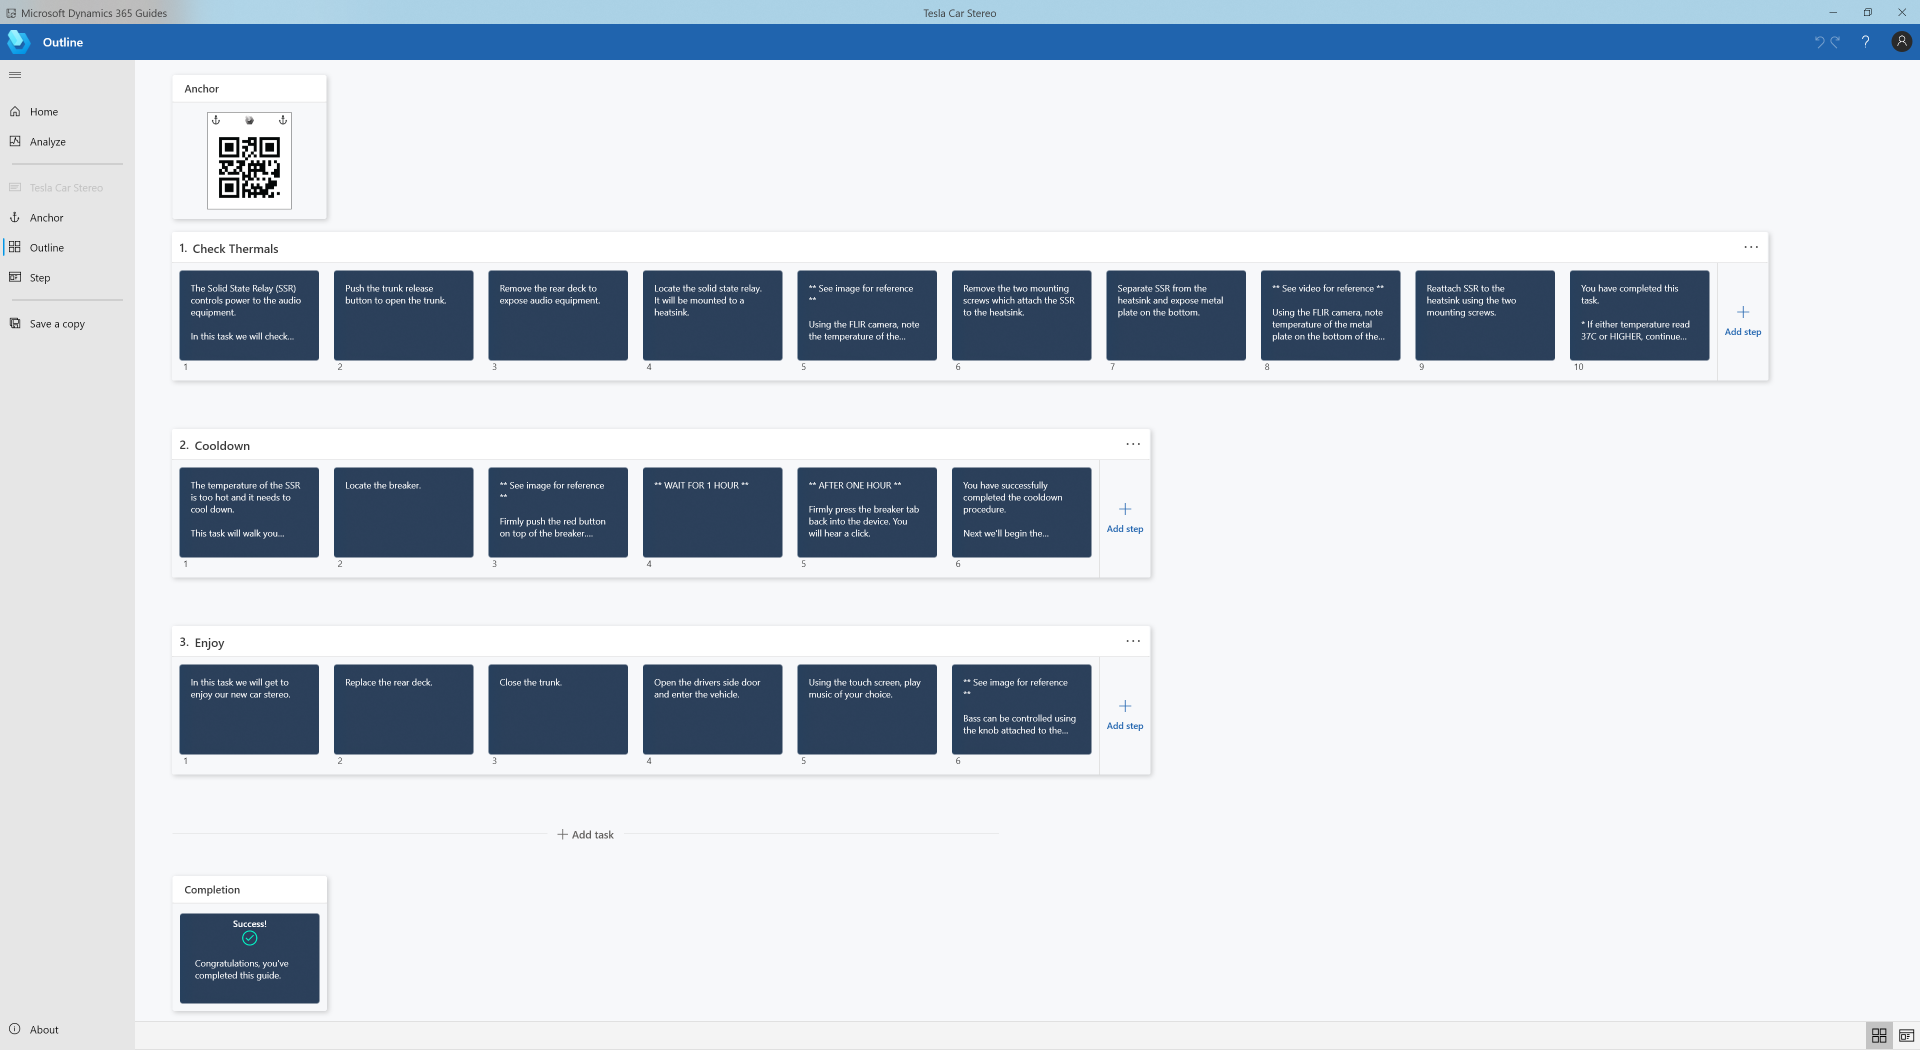
This is where we add Tasks and Steps. Tasks are just a collection of Steps, and a ballpark recommendation is to have no more than 30 Steps in any Task. It’s also helpful to think about the natural points where a user might want to pause and take a breath. Right after completing complex or difficult Steps is a good place to start a new Task. It’s also a great place to inform the user of their success and give them a moment to relax before moving on!
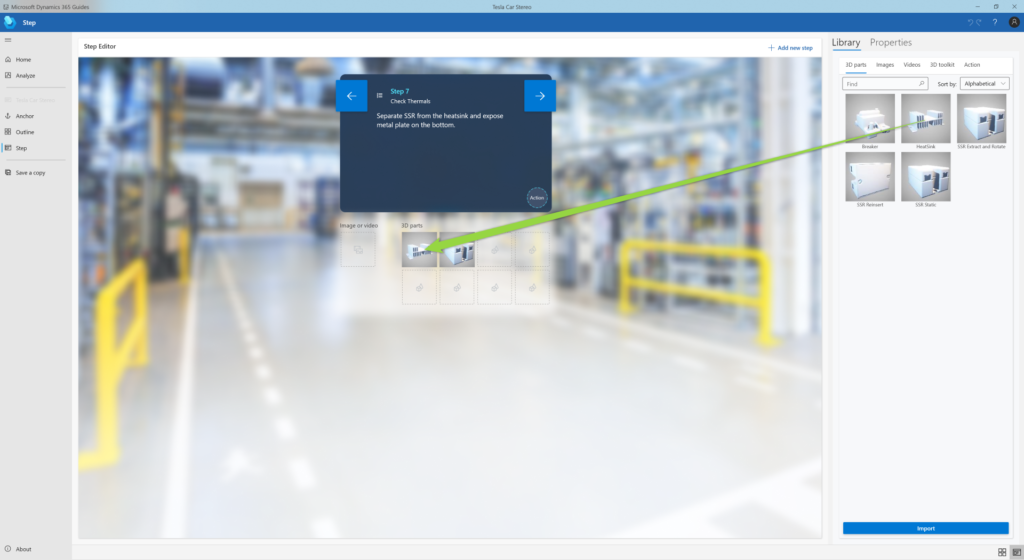
Creating a Step is surprisingly intuitive. It’s kind of like filling out a slide in a PowerPoint template. Importing custom content is easy too. Just click the Import button and browse to select the file.
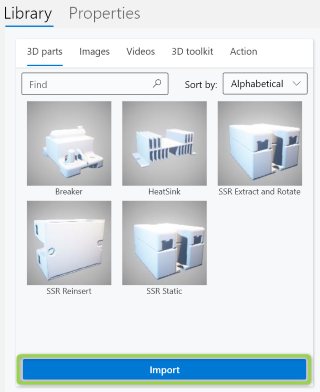
Once a file has been imported, simply drag it from the Library to one of the open slots in the Step.
We don’t actually position 3D objects in space while working in the desktop tool. Instead, once the steps are created we move to the HoloLens and position them there. This process was also surprisingly intuitive, and the hand manipulation UX is honestly one of the best I’ve ever used.
I’d love to see these components end up in MRTK at some point, since I’d really like to use them in my own apps too!
Custom models
I already mentioned the import custom models article above, but I also wanted to share an incredibly valuable resource I found while creating my guide.

GrabCAD has a community of over 7 million members, and they offer a library of more than 4 million parts! What blows my mind is that the whole library appears to be provided free of charge. I am not a lawyer so don’t take this as official licensing advice, but their terms for user submissions appear to allow for “non-commercial internal use”. If your own licensing teams permit it, this may be a fantastic resource to leverage for finding already modeled parts.
For my guide I used the following parts:
- SSR Heat Sink by Cristopher Schroeder
- Solid State Relay by Morten Nielsen
- Circuit Breaker 120amp by BC Robotics 4504
Thank you!
Converting models
The parts on GrabCAD come in a variety of formats, but one of the most popular there is a format called STEP. Unfortunately, Guides doesn’t support STEP natively but I found a great plugin called STEPper that opens STEP files in Blender. There are free and paid versions of the plugin, but so far I’ve only needed free.
If you want to convert an unsupported model format to work with Guides, here’s the basic workflow:
- If necessary, find and install a plugin that allows Blender to open the file
- Go to File -> Import and open the file
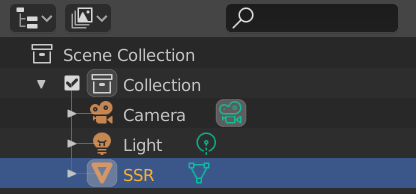
- Click on the part in the Scene Collection to select it
- Press ‘N’ on the keyboard to bring up the Transform panel
- In the Transform panel, use the Dimensions area to make sure the object is at the right scale.
- Important: Even though the Dimensions area says m (meters), I believe this was being treated as centimeters during glTF export. This could also have been a bug. The point is that you’ll want to test it on the device to ensure it’s right.
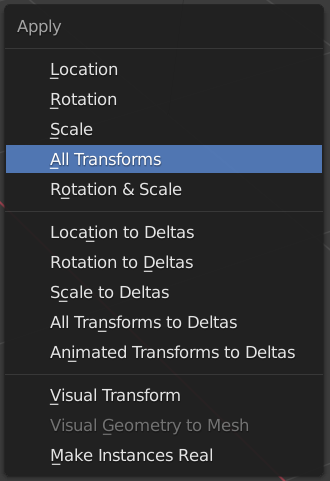
- If you needed to move, rotate or scale the object in any way, press Ctrl+A to bring up the Apply window then select All Transforms to make these changes permanent.
- With the object still selected, click File -> Export -> gLTF 2.0
- In the Export window, make sure the box is checked under Include -> Selected Objects. Otherwise, your model will include everything in the scene.
- You can optionally check or uncheck the animation options as well, and I’ll talk more about animations in the next section.
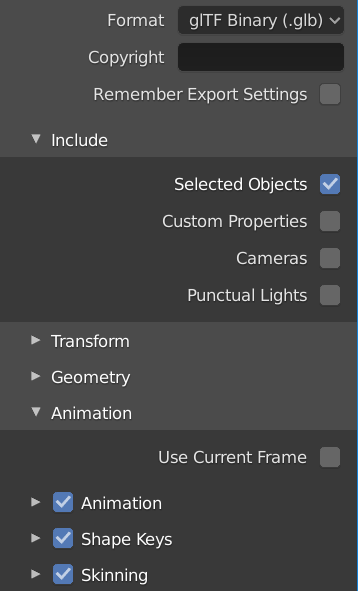
- Finally, click the Export glTF 2.0 button at the bottom to save the file.
Congratulations, you now have a model you can use with Guides!
Animations
Luckily, animating models for Guides is no different than animating any other object in Blender. There are many Blender animation tutorials available so I won’t cover those topics here, but I did want to share a few important tips I learned along the way.
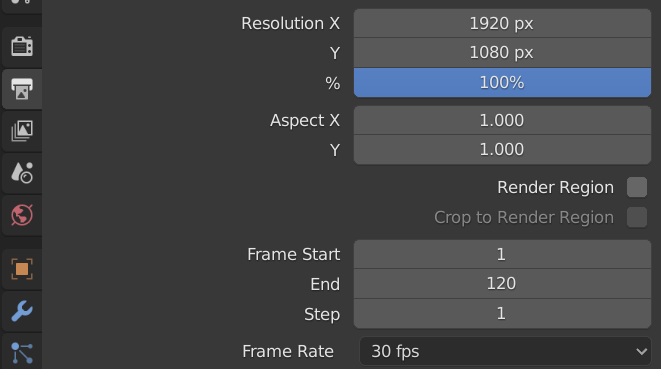
First, animation settings like Frame Rate are actually found in the Output Properties pane rather than in the animation settings itself. Funny enough, this tab looks like a printer. 🙂
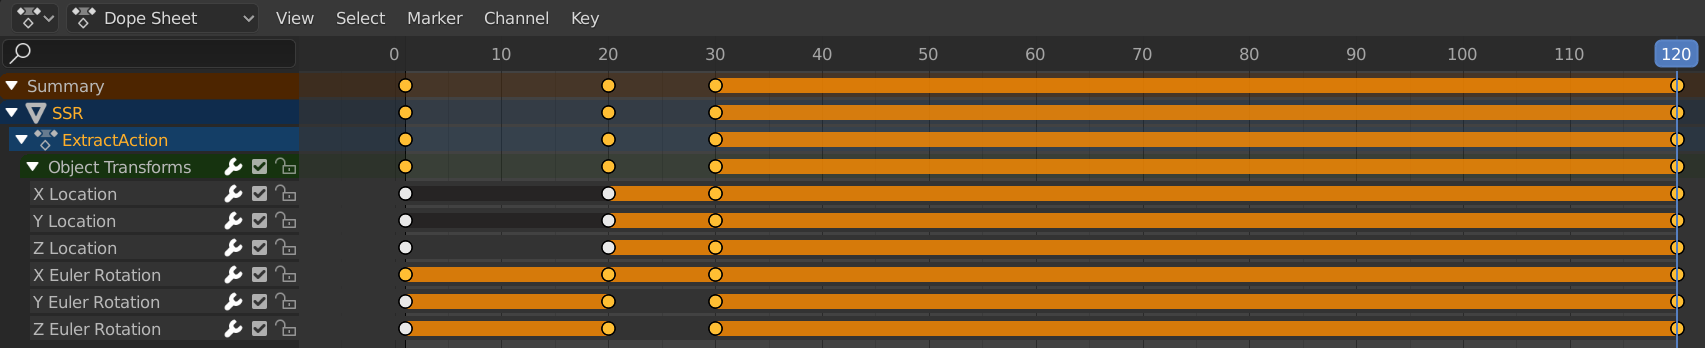
When exporting to glTF, empty frames at the end of the animation will be ignored! Since Guides automatically loops your animation, if you want the animation to “pause” between loops you’ll need to create an extra keyframe at the end to hold the last frame. Here’s what it looks like:
When creating guides it’s common to need one animation for extracting a part and a “reversed” version of that animation for reinserting it. This can be accomplished in Blender, but it’s not at all intuitive so I’ll show you how to do it.
With the animation window open, start by dragging a selection around the keyframes you want to reverse. Once they’re selected, press the ‘S’ key to begin “scaling” those keyframes. In “scaling” mode you’ll see a black line on the timeline and the mouse cursor turns into a double arrow.
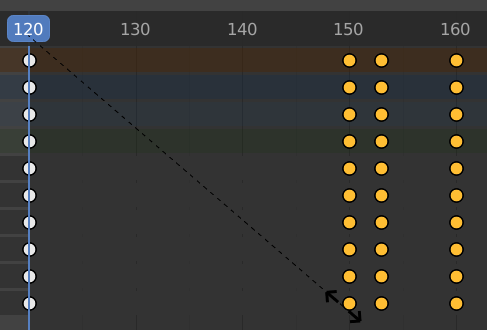
While in scaling mode, when you drag the mouse left or right you’ll see the keyframes “compress” together or “expand” apart. Dragging them before the beginning of the animation or after the end the animation will cause those frames to reverse. It’s not obvious, but you can also type ‘– 1′ on the keyboard to get the exact reflection of the original keyframes.
Once the keyframes are mirrored, there’s a good chance some of them will be outside the the timeline. Press ‘G’ to “grab” selected frames and drag them back onto the timeline.
I know that whole process sounds confusing (because it is), so here’s a quick clip to demonstrate how it’s done:
Iterate
The last thing I want to mention is that your guide may never actually be “done”. Processes change over time, and learning from your users can provide some valuable insights!
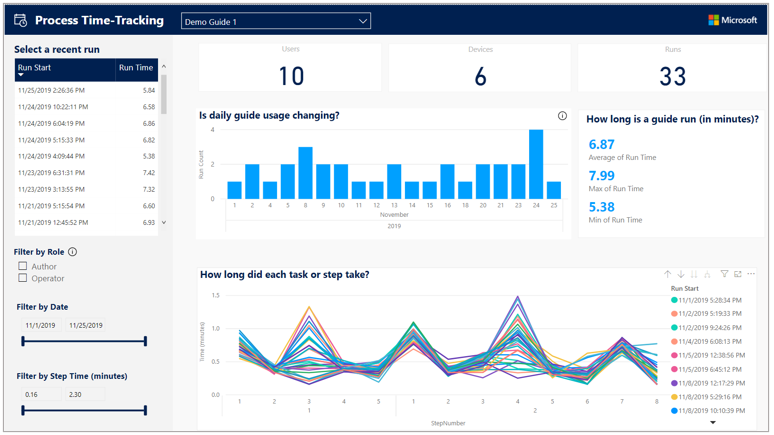
Guides provides reports that can show (among other things) how long users take to complete a Guide and how long they might be stuck on a particular Step. This might help you to decide to break a complex process into additional Steps, or possibly even create a whole new Task.
If you’re interested, check out the this article or video to learn more.
Try it out
I had a lot of fun writing this article. Obviously Guides isn’t free forever, but they do offer a free 30 day trial. Guides may or may not be a fit for your team, but either way it’s pretty cool to experience and I have a feeling you’ll also have fun in the process.