This article is part of a series created to demystify natural language and help you use it in your own applications.
Part 1 – Natural Language for Simulations
Part 2 – NLU for XR with LUIS (this page)
Part 3 – Custom Intent Handlers (coming soon)
Part 4 – Resolution and Routing (coming soon)
Table of Contents
Intro
As mentioned above, this article is part of a series. If you haven’t read Part 1 – Natural Language for Simulations yet, I highly recommend taking a break and reading that first before continuing.
If you’ve already determined that natural language is a good fit for your application, this article will walk you through adding LUIS capabilities to your project. This is a step-by-step guide that will result in being able to change the color and size of objects in your scene using natural language, but in Part 3 – Custom Handlers we’ll explore how you can create and handle your own specialized intents.
In this article we’ll start by getting our own personal instance of LUIS running on Azure. Then we’ll configure Unity to work with LUIS, and finally we’ll create a simple scene to test everything out. We’ll link to the code again later, but for those who like to jump right into source you can find the repo here.
Though you may see “MR” and “Mixed Reality” in the assets, this library works with all Unity projects that support .NET 4.6. The only exception to this rule is the Luis Dictation Manager (described below) which needs Windows 10 APIs to access the microphone. This component is optional and will work on all devices that run Windows 10, including HoloLens.
Azure Setup
LUIS is an Azure hosted service, which means you’ll need an Azure account to use it. If you don’t have one yet you can create one for free and receive a $200 credit using this link. Though LUIS is a paid service, the free tier provides up to 10,000 transactions a month at no cost.
Create a LUIS Endpoint
In order to talk to LUIS from Unity, we need to add a LUIS endpoint to our Azure subscription. Since these steps may change over time I’ll point you to the official guide. But remember that you can start with a F0 (free) account and you don’t have to follow the steps for changing the pricing tier.
Please follow these steps before moving on:
Official Guide: Create a LUIS Endpoint
Import the Sample Domain
In LUIS, a domain is a set of entities and intents that work together to accomplish common tasks. LUIS includes several prebuilt domains for things like listening to music or buying movie tickets. LUIS doesn’t include a prebuilt domain for common XR tasks, but we’ve created one you can use as a starting point. This section walks you through creating a LUIS application based on the sample domain.
LUIS domains can be saved and imported as .json files. Our sample domain has already been exported and it’s saved up on GitHub. Simply right-click on LUIS XR Domain and choose Save link as to save a copy of the domain to your local machine.
Now it’s time to log into the LUIS website (sometimes referred to as the Application Designer). For most customers the address will be www.luis.ai. However, the address does change for a few regions and it’s very important you log into the site that matches the endpoint you created above. The full list of addresses can be found here.
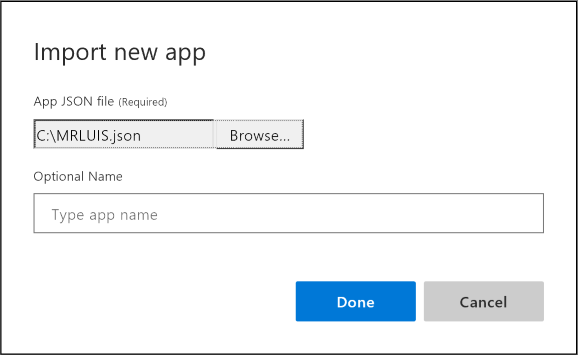
Once you figure out the right URL, go to the site and sign in with the same credentials you use for Azure. Then, click the Import new app button:

Click the Browse button and locate the .json file we downloaded above.
Click Done to create a new application based on the sample domain.
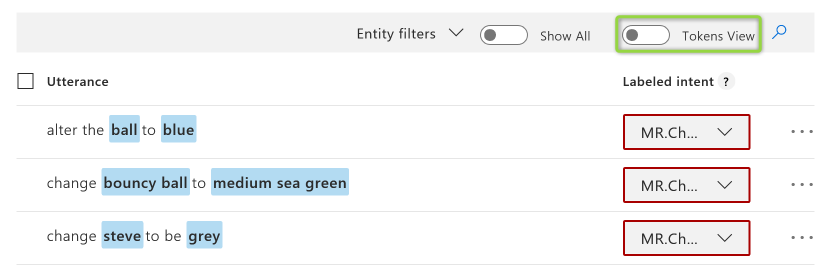
After a few seconds you’ll see several new intents like MR.ChangeAppearance and new entities like MR.Color.
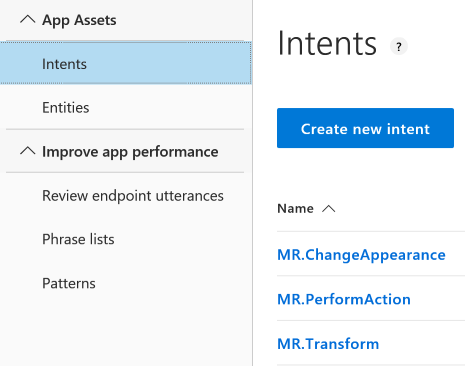
Feel free to browse through the various intents and entities to get a feel for how the sample domain was created.
For example, check out the MR.ChangeAppearance intent in Tokens View to see some of the utterances that will be used to train the model.
Train and Publish
At this point you have a LUIS application that’s populated with intents and entities. However, the underlying machine learning model hasn’t been trained yet, which needs to happen before we can publish the app for use.
Luckily, this part is easy – just click the Train button at the top of the screen.
![]()
The system will think for a few moments, and when the underlying model is trained the dot will turn green.
![]()
It’s always good to pay attention to the color of the training dot. Whenever changes are made that require training, the dot will turn red. And while the dot is red things may not work like you expect them to. Test utterances, for example, may not resolve the way you expect while the model is out of date.
Now that the model is trained, we can publish it. Switch to the PUBLISH tab at the top of the page.

If this is the first time you’ve published your LUIS app, you’ll need to connect the LUIS App Designer to your publishing endpoint on Azure. This step only needs to be done once and you can skip it when you publish updates in the future.
Scroll down to the bottom of the page and click the Add Key button under Resources and Keys.
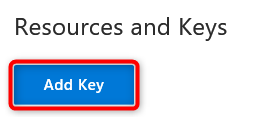
In the box that pops up, be sure to pick the right Tenant and Subscription (most people will only have one option in these drop-downs). After that, you should be able to select the Key for the LUIS endpoint that you created in Create a LUIS Endpoint above.
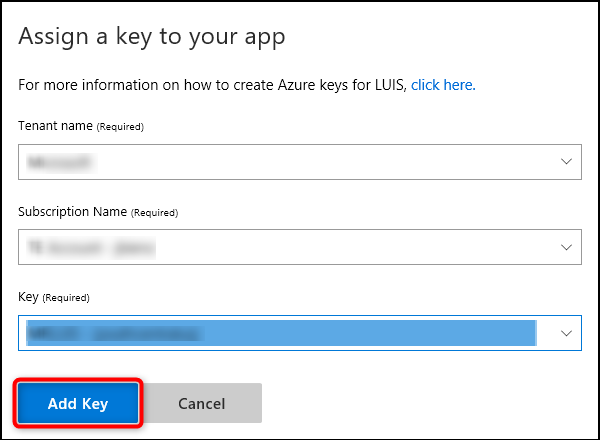
Click the Add Key button. Now the LUIS Application Designer is connected to your endpoint on Azure.
All that’s left to do is publish the application to our endpoint. Scroll back up to the top of the page, make sure the Slot is set to Production, then click the Publish button.
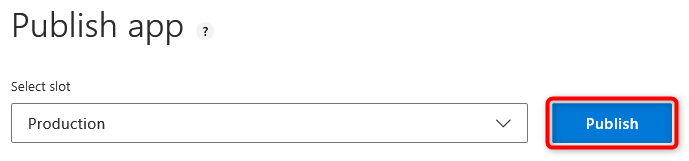
IMPORTANT: Please copy down the URL at the bottom of the page. This URL provides the values you’ll need to plug into Unity below.
For example:
https://<DOMAIN>.api.cognitive.microsoft.com/luis/v2.0/apps/<APP_ID>?subscription-key=<APP_KEY>&verbose=true&timezoneOffset=0&q=
Your LUIS application is ready to be used in Unity! Don’t forget: If you make changes to the model in the future, you need to both Train and Publish your model for those changes to take effect in the application.
Unity Setup
Now it’s time to setup our Unity application to use the LUIS application we just published. LUIS for XR is an open source reference architecture created by Microsoft, Object Theory and Valorem. The steps below will import the LUIS for XR Asset Package, but full source code and additional information can be found on GitHub.
Import Asset Package
Because LUIS for XR leverages the official LUIS SDK for .Net, your Unity project will need to be configured for .Net 4.6. To do that, click on Edit -> Project Settings -> Player.
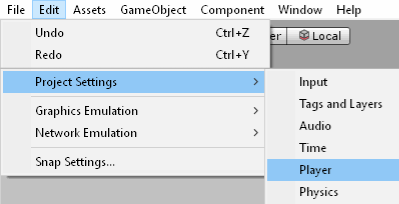
Under the Configuration section, set Scripting Runtime Version to .NET 4.6 Equivalent and set Api Compatibility Level to .NET 4.6.

NOTE: When you make these changes, Unity will need to reload the project.
Next, download the LUIS for XR Unity Package. When the file has finished downloading, return to Unity and click Assets -> Import Package -> Custom Package.
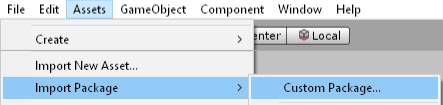
In the window that pops up, select the package you downloaded in previous step and open it.
You’ll see a window pop up with all of the assets included in the package. The package includes everything you need including the SDK plugins, dependencies, the library itself and a sample scene.
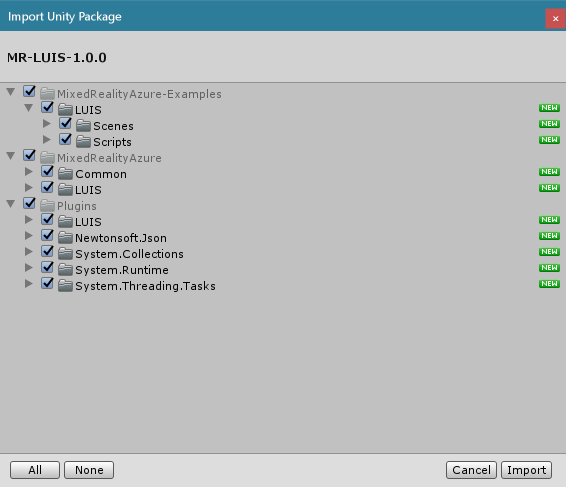
It’s recommended that you leave everything checked and click the Import button to finish importing the package.
Add LUIS to the Scene
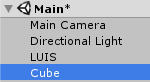
Now that the asset package has been imported, we can add LUIS to the scene. Let’s start by creating an empty game object named LUIS. Right-click on the scene itself and choose GameObject -> Create Empty then name the object LUIS.
![]()
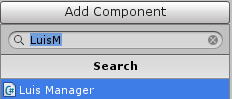
With the LUIS game object selected, in the Inspector panel click the Add Component button and add the Luis Manager behavior.
Think of Luis Manager as the connection to the LUIS app running on Azure. In the inspector for Luis Manager, enter the same AppId, AppKey and Domain from the URL at the end of the Train and Publish section above.
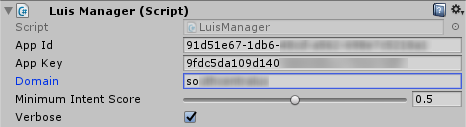
Minimum Intent Score allows you to set a minimum confidence level that must be reached before the intent is processed. The default value is 0.5, which means LUIS should be at least 50% confident it understood the right intent before the the intent will be handled.
Verbose allows all of the intents to be received and not just the top-scoring intent. This can be turned off, but in some domains you may see a 400 error if this is disabled so it’s recommended to leave it checked.
Make a Prediction
Now it’s time to send an utterance to LUIS and let LUIS predict what the user is trying to accomplish in the scene. We can make a prediction in code by calling LuisManager.PredictAndHandleAsync, but when we’re testing and prototyping there’s an even easier way.
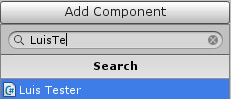
On the same LUIS game object we created earlier, click Add Component then choose Luis Tester.
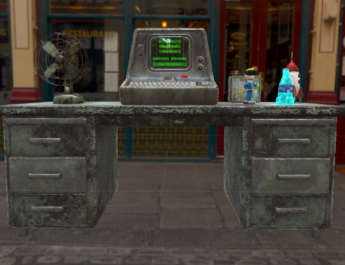
Luis Tester allows us to make predictions on the fly, but only in Play mode. So click the Play button in the Unity Editor to run the scene. Now that we’re in Play mode, a Predict button should appear for Luis Tester. In the Test Utterance box, type the text “make the cube green” and click Predict.

If everything is setup correctly, you should see a warning in Unity’s console window informing you that “cube” wasn’t mapped to the scene. We’ll address that next.
![]()
In LUIS, entities are used to represent a lot of things. An entity can represent a thing, like a person or a car, but an entity can also represent data, like a color or a number. Part of what makes the LUIS for XR package so helpful is an extensible system for mapping LUIS entities into the Unity scene. Part 4 – Resolution and Routing will cover this system in depth, but for now we’ll use one of the built-in behaviors to map a game object to a LUIS entity.
In the Hierarchy panel, right-click the root of the scene and create a new Game Object -> 3D Object -> Cube.
With Cube selected in the Hierarchy, go to the Inspector panel and use the Add Component button to add the Entity Metadata behavior.
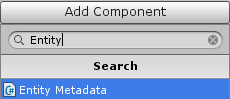
The Entity Metadata behavior makes the game object a LUIS entity. With this added, we can give the object both a name and a type. Let’s set Entity Name to “Boxey” and set Entity Type to “Cube”.

Now if you press Play in the Unity Editor and attempt the prediction again, you’ll see that the warning message has gone away. Unfortunately, nothing changes with the cube! Even though Unity knows the cube is a LUIS entity, the cube still isn’t handling any intents. Let’s handle one now.
Handle an Intent
With Cube selected in the Hierarchy, go to the Inspector panel and click the Add Component button again. This time, add the Appearance Intent Handler.
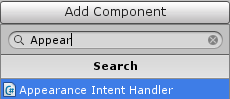
Appearance Intent Handler is a Unity behavior that handles the MR.ChangeAppearance intent. You may recall that MR.ChangeAppearance was one of the example intents we imported above as part of the sample domain. MR.ChangeAppearance allows you say things like “make <Entity Name> blue” or “turn the <Entity Type> green“. Hopefully it makes sense now how the values we chose for Entity Metadata above are used.
Click the Play button in the Unity Editor to run the scene again. In the inspector for Luis Tester, type the text “make the cube green” and click the Predict button. This time, the cube should actually turn green.

If you’re curious, dive into the code for Appearance Intent Handler to see how the intent is handled. We’ll cover handling in depth in Part 3 – Custom Intent Handlers, but see if you can figure out where the colors come from and which ones are supported.
Finally, let’s see how easy it is to combine multiple intents on the same object. With Cube selected in the Hierarchy, go to the Inspector panel and click the Add Component button again. This time, add a Transform Intent Handler.
![]()
Play the scene one more time and in the inspector for Luis Tester type “make the cube bigger”. Click the Predict button and see what happens.
Enable Speech Recognition
So far we’ve been sending text to LUIS, but many applications will want to use speech as the input source for natural language. Any method of converting speech to text can be used with Luis Manager, but we’re providing an out-of-the-box example that uses DictationRecognizer for Windows 10. This part is optional and currently only works on Windows 10 devices, but we’re investigating other options for handling speech on other platforms. We’ll update this post when other options become available.
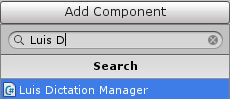
Select the LUIS game object we created earlier (the same game object with Luis Manager) and click Add Component. Then choose Luis Dictation Manager.
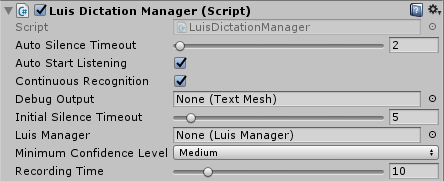
Luis Dictation Manager has several options, but the defaults work well. Here is some information on the various settings:
Auto Silence Timeout is how long there must be silence after speech is detected to consider it a complete sentence.
Auto Start Listening begins listening for speech as soon as the app launches.
Continuous Recognition means the app will continue to listen for speech as long as it’s running. If this is not checked, listening must be started by code after each sentence or timeout.
Debug Output allows you to connect a Unity Text control to show feedback about recognition at runtime.
Minimum Confidence Level specifies how confident Luis Dictation Manager should be about what was heard before sending the recognized text to Luis Manager.
With Luis Dictation Manager added, press Play in the Unity Editor. Now you can speak to LUIS using your voice instead of typing commands with Luis Tester! Try saying things like:
- “Let’s make the cube yellow”
- “Turn the cube purple”
- “Scale the cube smaller”
IMPORTANT: Unity’s console window will display information about initializing the microphone and what was heard. You can also connect a Unity Text control to Luis Dictation Manager in order to see these messages in the scene.
Congratulations! You’ve fully enabled natural language in your Unity application. Try adding more objects to your scene with different names and types, or check out the LuisTest.unity scene for a complete example.
What’s Next?
This article walked us through adding LUIS to an existing Unity application. In Part 3 – Custom Intent Handlers (coming soon), we’ll show you how to define and consume your own custom intents!
Special Thanks
This work started as a PoC at an internal hackfest in December. The amazing team that built the PoC included Adina Shanholtz, Anna Fear and David Douglas.
The PoC continued to evolve into the Reference Architecture in partnership with Object Theory and Valorem. This project is ongoing and there are opportunities to contribute. If you’re interested please reach out to Jared on GitHub.
Microsoft Team
- Adina Shanholtz – PoC Team
- Anna Fear – PoC Team
- David Douglas – PoC Team
- Jared Bienz – Reference Architecture
- Nick Landry – Testing, Community Awareness
Object Theory
- Michael House – Reference Architecture
Valorem
- Stephen Hodgson – Reference Architecture